19 Steps to Lay a Concrete Slab Effectively
Laying a concrete slab is a crucial step in creating a stable foundation for various outdoor structures such as sheds, pergolas, gazebos, patios, and outdoor kitchens. This process involves creating a solid, level, and dry base that can support the weight and withstand the elements. While it may not be excessively complicated, it requires physical exertion and efficiency, making it advantageous to have the assistance of one or more individuals.
A concrete slab serves as a reliable platform for these large-scale projects, ensuring their stability and longevity. By providing a solid base, it prevents sinking or shifting of the structures over time. Moreover, a level surface is essential for maintaining the structural integrity and aesthetics of the project. With a flat and even foundation, the structures can be assembled accurately and securely, ensuring a professional finish.
One of the primary challenges in laying a concrete slab is the physical labor involved. It demands a significant amount of strength and endurance to mix and pour the concrete, as well as spread and level it evenly across the designated area. The weight and viscosity of the concrete mixture, along with the need for swift execution, can be physically demanding for a single person. Therefore, having the assistance of one or more individuals can greatly expedite the process and minimize strain on the body.
Additionally, the speed at which the concrete is poured and spread is essential to achieve a uniform finish. Concrete sets relatively quickly, especially in warmer weather, so working efficiently becomes crucial. By having one or more assistants, the concrete can be mixed and poured continuously, allowing for a smoother and more consistent slab. This teamwork ensures that no time is wasted, minimizing the risk of uneven drying or cracking.
WORKING TIME: 6 – 8 hrs
TOTAL TIME: 2 – 4 days
YIELD: 20-foot by 12-foot concrete slab
SKILL LEVEL: Advanced
Prior to Starting the Project
When embarking on the task at hand, it is crucial to understand the quantity of concrete necessary. In the case of a concrete slab measuring 20 feet in length, 12 feet in width, and 4 inches in thickness, a substantial amount of concrete—specifically, 3 cubic yards—will be required.
While small-scale projects such as slabs or countertops can be managed by hand, manually mixing the concrete in a wheelbarrow, larger undertakings pose a challenge. The task of consistently mixing and delivering a steady flow of wet concrete to the form before the previously poured concrete hardens becomes exceedingly difficult.
To tackle larger concrete batches effectively, it is advisable to employ alternative methods. One option is to utilize a portable concrete mixer, which simplifies the process and ensures a consistent mixture. These mixers offer convenience and efficiency, allowing for a more manageable and homogeneous blend of concrete.

Utilizing a Portable Concrete Mixer
Obtaining a portable concrete mixer for your project can be accomplished by renting one from rental yards or certain home centers. These convenient facilities offer the option of renting these gas-powered mixers for daily or weekly use. With the capacity to churn up to 9 cubic feet of wet concrete, these mixers are capable of handling substantial volumes.
However, it is important to note that a vehicle equipped with a tow package is necessary for transporting these larger mixers. Due to their size and weight, they must be towed to the desired location, requiring the use of a vehicle with the appropriate towing capabilities.
When it comes to creating the concrete mixture, there are two options to consider. The first option is using bagged ready-mix concrete, which is readily available in pre-measured bags. This option offers convenience, as it eliminates the need for precise measurement and mixing of individual components.
The second option involves using loose ingredients, namely cement, rock, water, and sand, to create the concrete mixture from scratch. This approach provides flexibility, allowing you to customize the mixture to meet your specific project requirements. However, it also necessitates accurate measurement and careful mixing of the components to achieve the desired consistency.
Using Pre-Mix Concrete
When arranging for bagged pre-mix concrete, it is advisable to have the concrete delivered on pallets in close proximity to the pour site.
If you choose to order 80-pound bags of ready-mix concrete, it is recommended to request approximately 134 bags to meet the requirements of your project.
In the case of 60-pound bags of ready-mix concrete, it is advisable to order approximately 178 bags to ensure an adequate supply for your project’s needs.
Loose Ingredients
When constructing general-purpose concrete slabs, such as patios, that require compression strength of 2,500 pounds, it is recommended to use a concrete mix ratio of 1 part cement, 2 parts sand, and 4 parts aggregate.
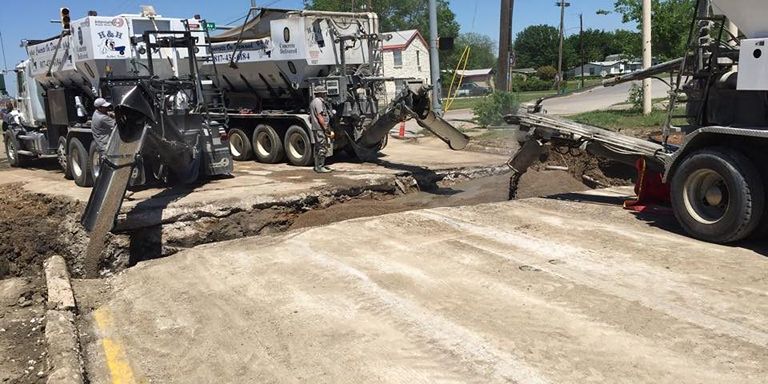
Using Volumetric Concrete Delivery
There are different methods of concrete delivery, one of which is barrel or tank concrete truck delivery. In this process, the concrete is mixed at a plant and then transported to the project site in mixing trucks. While this method is suitable for large-scale professional concrete work, it may not be the most ideal choice for do-it-yourselfers. The reason that the batches of concrete can be too large for smaller projects and the working time may be limited, making it challenging to manage.
On the other hand, volumetric concrete delivery provides an alternative approach. This method involves bringing the concrete plant directly to the project site. With the use of an onboard computer system, the proportions of dry materials and water are precisely determined. The concrete is then mixed on-site and poured as needed.
One significant advantage of volumetric concrete delivery is the flexibility it offers in terms of the quantity of concrete required. Shorter loads can be delivered, ensuring that you receive the exact amount needed for your project. Furthermore, the concrete is freshly mixed on the spot, guaranteeing its quality. In contrast, barrel or tank concrete deliveries may sometimes arrive with the concrete already starting to set up, as it can be wet and prone to rapid hardening by the time the truck reaches the destination.
Deciding When to Lay a Concrete Slab
The temperature conditions play a crucial role in the successful pouring of a concrete slab. It is important to consider both freezing and high temperature extremes that can adversely affect the quality and strength of the concrete.
Firstly, it is crucial to avoid freezing conditions during the concrete pouring process, as the mix can freeze and expand, leading to potential cracking and compromised structural integrity. Therefore, it is recommended to refrain from pouring concrete when temperatures are at or below freezing.
On the other hand, extremely high temperatures, specifically those exceeding 90° F, should also be avoided. In such conditions, the water content within the concrete mixture can evaporate rapidly, causing the concrete to set too quickly. This premature setting can result in weakened concrete, impacting its durability and overall strength.
Ideally, the best time to pour a concrete slab is during the early morning or when the temperatures are around 60° F. These moderate temperature conditions allow for a more controlled curing process, ensuring optimal strength development and minimizing the risk of premature drying or freezing.
Ensuring Safety When Working with Concrete
Working with wet concrete poses potential risks due to its caustic nature, which can lead to a condition known as cement burns. These burns have the potential to cause blisters, scars, and damage to the skin, including hardened or dead skin. To mitigate these risks, it is essential to take appropriate safety precautions.
When working with wet concrete, it is imperative to wear waterproof gloves to protect your hands from direct contact with the caustic mixture.

Additionally, wearing rubber boots and long sleeves provides an extra layer of protection for your skin. These protective measures minimize the risk of cement burns and reduce the potential for injuries.

You’ll need
- Equipment / Tools
- Pull tie wire twister (for rebar)
- Hammer
- Tape measure
- Circular saw or miter saw
- Bubble level
- Shovel
- Bull float
- Screed tool
- Grover tool that can attach to bull float handle
- Edging tool
- Tamper
- Cordless drill
- Garden hose
Instructions
1. Mark the Location
To begin, measure the project site using a tape measure to determine the desired dimensions. Next, utilize a hammer to firmly drive stakes into the ground at each corner of the designated area. It is important to drive the stakes deeply into the ground to ensure stability and create a secure foundation for the subsequent steps. This allows for the proper alignment of the twine, which can be tightly drawn around the stakes. By doing so, the twine effectively defines the boundaries of the slab area, providing a clear visual guide for the upcoming construction process.
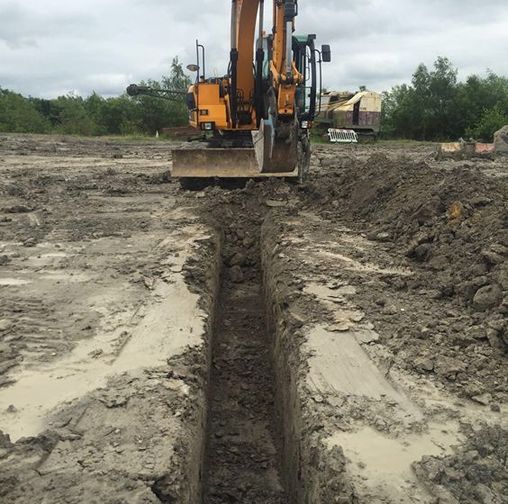
2. Excavating the Ground
If the site is already compact and composed of well-draining sand or gravel, it may not be necessary to establish a separate gravel base. In this case, the excavation depth should be 4 inches.
However, if a gravel base is required, it is necessary to dig down to a depth of 8 inches. This depth accounts for both 4 inches of gravel and an additional 4 inches for the concrete slab.
In instances where the intended slab area is covered with grass, the first step involves removing the turf. This process itself typically removes approximately 3 or 4 inches of material from the overall excavation depth.
3. Level the Site
To prepare the site, start by manually removing rocks, sticks, and other debris by hand. Ensure that the area is clear of any obstructions. Next, use a rake to smooth down the site, creating a level and even surface. To check for levelness, take an 8-foot two-by-four and lay it straight across the site at various angles. Place a bubble level on top of the two-by-four and use it to verify if the surface is level at different points around the site. This step ensures that the site is properly leveled before proceeding with further construction activities.
4. Compact the Base
Utilize the hand tamper to compact the soil by applying downward pressure. Continuously monitor the level of the surface to ensure that the soil is not compacted unevenly, maintaining a consistent level throughout the tamping process.
5. Pour the Gravel
If an additional gravel base is required for the site, carefully pour the gravel and ensure thorough compaction by tamping it down firmly and evenly. Once compacted, make sure to level the gravel surface for optimal results.
6. Prepare the Form Stakes
Using a circular saw or an electric miter saw, carefully cut 24 pieces from two of the two-by-fours, ensuring that each piece measures 1 foot in length. Subsequently, cut each 1-foot section diagonally to create triangle-shaped stakes. Exercise caution and precision during the cutting process to achieve accurate and consistent triangular form stakes.
7. Insert the Stakes
At each corner, place two stakes, with one stake on each side. Drive stakes approximately every 2-1/2 feet along the perimeter of the designated area, ensuring continuous alignment with the string. It is important to reserve two stakes without driving them into the ground just yet.
8. Build the Form
Using 3-inch screws, secure the two-by-fours to the stakes as follows:
- Attach a 12-foot two-by-four to each stake on the shorter sides.
- Attach a 12-foot two-by-four and an 8-foot two-by-four to each stake on the longer sides.
Raise the form sides by 1/2 inch to achieve a complete 4-inch thickness for the concrete slab. It is essential to verify the levelness of all sides to ensure uniformity.
Ensure that the stakes are positioned on the outer side of the two-by-four forms. When attaching the screws, drive them from the outside toward the inside of the forms.
Place the final two stakes at the junction where the 12-foot and 8-foot boards meet on the longer sides. This prevents any seams from sagging or becoming uneven, ensuring a seamless and well-supported structure.
9. Apply a Coating to the Concrete Form
To enhance the ease of removing the concrete form, utilize substances like vegetable oil, motor oil, mineral oil (excluding mineral spirits) or a concrete-form release agent. Apply any of these options to coat the interior of the concrete form, ensuring a smoother and more straightforward form removal process.

10. Grade Again
Relevel the gravel or base to achieve a compact and level surface. Place a screed board across the tops of the forms, and using a tape measure, measure downwards to verify a consistent 4-inch depth throughout the entire area. This step ensures that the gravel or base is properly graded and maintains the desired thickness for the concrete slab.
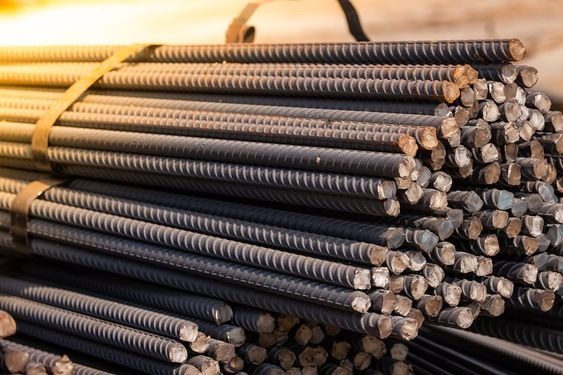
11. Positioning the Rebar
Rebar Mesh:
Cut and position a 6-inch rebar mesh across the entire site, ensuring that it covers all areas except for a 3-inch band on the outer edges. Exposed rebar is susceptible to rust, which can compromise the strength of the concrete.
Connect the pieces of rebar mesh together using rebar ties. While not necessary, using dobies, which are elevated blocks, can be helpful. Dobies not only raise the mesh but also assist in holding down any springy sections of the mesh.

Rebar Rod:
If you opt for rebar rod, create a grid of rods spaced every 2 feet. Use a tying tool to add ties at each intersection where rebar crosses over another piece.
Elevate the rebar grid using 20 to 25 evenly spaced dobie blocks. Attach the rebar grid to the dobies using the ties provided with the dobies themselves.
12. Wet the Gravel Base
Before the arrival of the concrete truck, use a garden hose to dampen the gravel base.
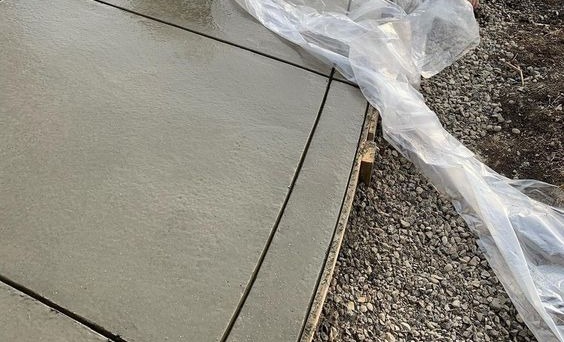
13. Pour the Concrete
Receive the concrete delivery from the concrete truck and proceed to pour the concrete evenly within the form. It is important to work efficiently and swiftly during this process.
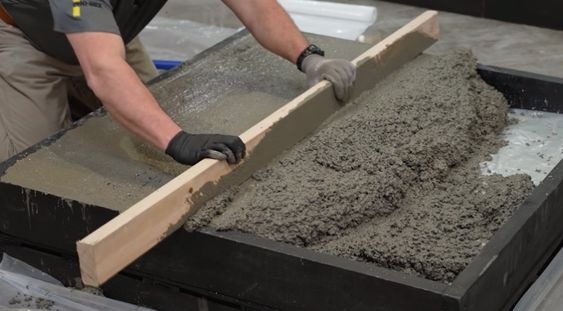
14. Leveling the Concrete Surface
Utilize a screed tool or an 8-foot-long piece of two-by-four to level the top surface of the concrete. Move the screed tool or the two-by-four back and forth across the concrete to eliminate any excess material and achieve a smooth, level surface.
15. Finishing the Concrete Surface
Pass the bull float over the concrete surface several times to eliminate any visible screed marks and to ensure that larger aggregate pieces are pushed down into the slab. This process helps achieve a more uniform and smooth finish.
16. Work on Edges
Allow the concrete to firm up slightly before proceeding. Then, using a hand edger, make long passes along the edges of the slab. This step helps create clean and defined edges for the concrete.
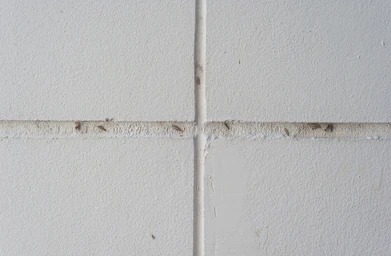
17. Add Contraction Joints
Attach the groover tool to the handle of the bull float. Begin by creating one or more contraction (control) joints that span from one long side of the slab to the other. To do this, position the grooving tool at the far edge of the form and pull it towards you. It is recommended to have at least one contraction joint, but preferably two or more, to allow for controlled cracking and expansion of the concrete.
18. Create Surface Texture
If desired, softly drag a push broom backwards across the wet surface to achieve a subtle texture.
19. Allowing the Concrete to Cure
Ensure the concrete remains moist by periodically misting it with water during the initial 24-hour period. After 48 hours, the concrete should be sufficiently hardened to support walking. However, complete curing of the concrete will typically take approximately one month.