How to Build a Home Successfully
Building your new home is an exciting experience, especially when you have a good grasp of how to build a home and the construction process. It’s natural for buyers to feel a sense of excitement as they witness their new home being built, starting from the foundation and progressing through each stage.
The process of building a home, and understanding how to build a home, unfolds gradually, allowing homeowners to witness the transformation firsthand. From the initial foundation pouring to the framing stage, they can see their home taking shape. It is at this point, when the home reaches the drywall stage, that homeowners begin to envision themselves living in the space. They start to imagine how they will arrange their furniture, entertain guests, and create lasting memories with loved ones.
Throughout the construction process, and understanding how to build a home, homeowners invest considerable time and effort in designing a home that reflects their unique family needs and personal tastes. Seeing their vision come to life is truly rewarding and fulfilling.
To ensure that you are well-prepared and informed about how to build a home, this article aims to provide a comprehensive overview of the typical steps your builder will take during the construction process. It highlights the key stages of construction and what you can expect to happen during each phase. By gaining insight into these stages, you will have a clearer understanding of the journey your new home will undertake.

1: Site Preparation and Foundation Pouring
Builder applies for and acquires permits
Before construction can commence, builders are required to obtain approval from the local government for the design and secure the necessary permits. These permits encompass various aspects, including zoning and grading, which involve modifying the land’s topography to accommodate the construction of your home and driveway. Additionally, when it comes to how to build a home, permits are needed for septic systems, home construction, electrical work, and plumbing. These permits serve as official authorization to proceed with the physical construction of the project.
Construction crew levels site
During the initial stages of construction, the site preparation and foundation work are crucial tasks that require meticulous attention. In most cases, these responsibilities are undertaken by a dedicated construction crew, although on wooded lots, the process may differ slightly. To ensure a solid foundation for the upcoming structure, the crew employs heavy machinery such as backhoes and bulldozers to meticulously clear the home site of any rocks, debris, and trees that may hinder the construction process. Additionally, if necessary, the crew proceeds with the excavation for the installation of the septic system, ensuring all necessary groundwork is completed to establish a strong and stable foundation for the future construction.
Installation of Temporary Wooden Forms for Foundation Construction
Site Leveling, Installation of Wooden Forms, and Excavation of Holes and Trenches
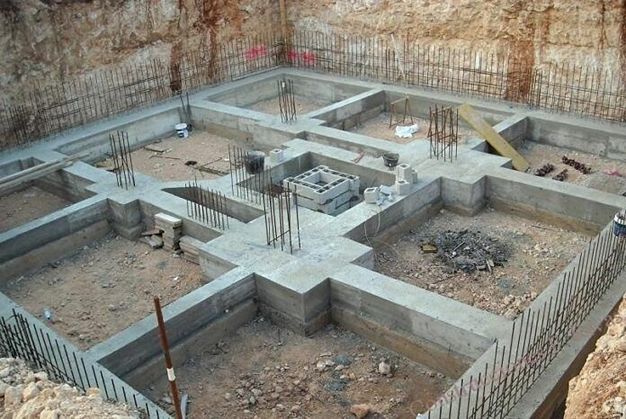
Installation of Footings for Foundation
Footings serve as the support system for the home, typically made of poured concrete and reinforced with rebar, to prevent sinking. The installation of footings depends on the specific requirements of the home. For homes with a well, it is dug during this phase. If the home has a full basement, the hole is dug, footings are formed and poured, and foundation walls are constructed. In the case of a slab-on-grade foundation, the footings are dug, formed, and poured, with the area between them prepared for utility runs before pouring the slab. After the concrete is poured, a curing period is necessary, during which no construction activities take place on the site.
After pouring the concrete into the holes and trenches, a curing process is required, allowing the concrete to harden and set. Throughout this period, no construction activities will take place on the site.
Installation of Waterproofing and Plumbing Systems
Once the concrete has fully cured, the construction crew proceeds with important tasks. They begin by applying a waterproofing membrane to the foundation walls, ensuring protection against water infiltration. They carefully install drains, sewer systems, water taps, and any necessary plumbing components for the first-floor slab or basement floor. Finally, the excavated soil is backfilled into the hole surrounding the foundation wall, ensuring stability and providing adequate support.
Timeline
Constructing the foundation and preparing the site for the house is a crucial and time-consuming step in the building process. It is important to understand that this phase often requires a significant amount of time, typically lasting for several weeks or even up to a month. Patience is key during this stage, as it plays a vital role in ensuring a solid and well-prepared foundation for the rest of the construction process.
2: Finishing the Rough Framing Stage
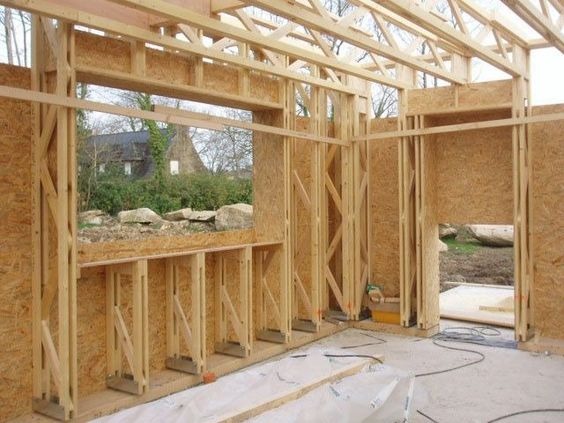
Finalization of the floor system, walls, and roof system
The construction of the floor system, walls, and roof system, which together form the core structure of the house, is finalized.
Exterior walls are sheathed and wrapped for protection
The construction process involves applying plywood or oriented strand board sheathing to the exterior walls and roof. This provides structural support and a base for the final exterior finish. Additionally, windows and exterior doors are installed, allowing for natural light and access to the building. To enhance the building’s durability and protection, a house wrap is applied over the sheathing. This protective barrier prevents water infiltration, while still allowing water vapor to escape, reducing the risk of mold and wood rot. The combination of sheathing and house wrap ensures the integrity of the structure and maintains a comfortable and safe interior environment.
Timeline
The duration of the framing process can range from approximately one to two months, which is influenced by factors such as the size and complexity of the home as well as weather conditions.
3: Finalize Rough Plumbing, Electrical, and HVAC Installation
At this phase, the following elements are put in place:
- Pipes and wires
- Sewer lines and vents
- Water supply lines
- Bathtubs and shower units
- Ductwork for HVAC system
- HVAC vent pipes
- Electrical wiring and receptacles
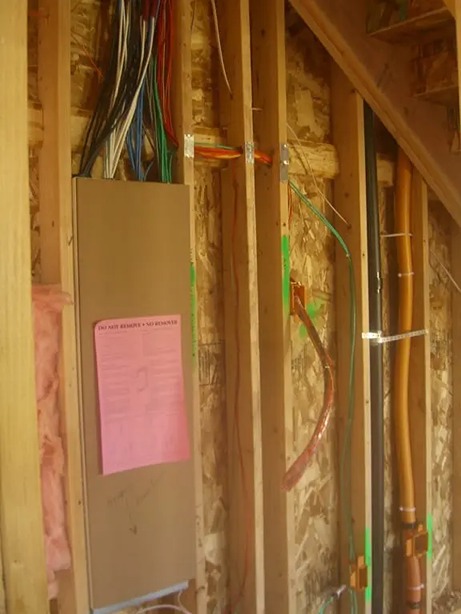
After completing the construction of the house’s shell, the next steps involve the installation of siding and roofing. Concurrently, the electrical and plumbing contractors commence their work, carefully routing pipes and wires through the interior walls, ceilings, and floors. The installation of sewer lines, vents, and water supply lines for each fixture is also carried out during this phase. Additionally, large fixtures like bathtubs and one-piece shower/tub units are strategically placed at this stage, taking advantage of the ample space available for maneuvering such bulky objects.
The installation of the heating, ventilation, and air conditioning (HVAC) system begins with the placement of ductwork throughout the house, ensuring optimal airflow. This includes the potential installation of a furnace, depending on the specific requirements. In addition, HVAC vent pipes are carefully positioned through the roof to facilitate proper ventilation. To enhance energy efficiency and comfort, insulation is then installed in the floors, walls, and ceilings, providing effective thermal insulation and soundproofing.
Once the roofing is installed, the house reaches the stage known as being “dried in,” which means it is protected from the elements. At this point, an electrician takes charge of the electrical installation. They carefully place receptacles for outlets, lights, and switches throughout the house, ensuring convenient access to electricity. Wires are then run from the breaker panel to each receptacle, ensuring a safe and reliable electrical connection. This process also includes the installation of wiring for telephones, cable TV, and music systems, providing comprehensive connectivity options for the homeowner.
It is important to note that in most cases, HVAC ducts and plumbing are installed prior to wiring. This sequence is preferred because it is generally easier to run wires around pipes and ducts rather than the other way around. By first installing the necessary ductwork and plumbing, the subsequent wiring process can be more efficiently and effectively carried out, ensuring optimal functionality and organization within the building’s infrastructure.
Timeline
While the installation of HVAC systems typically requires a relatively short duration of three to seven days, the completion of other mechanical components, including plumbing and electrical work, can extend the timeline to approximately two to four weeks. It is crucial not to rush through this step, as thoroughness is essential to avoid any delays caused by inspections. Taking the necessary time to ensure proper installation and compliance with regulations will contribute to a smoother construction process, preventing any hindrances that could further prolong the project and impede its progress.
4. Install Insulation
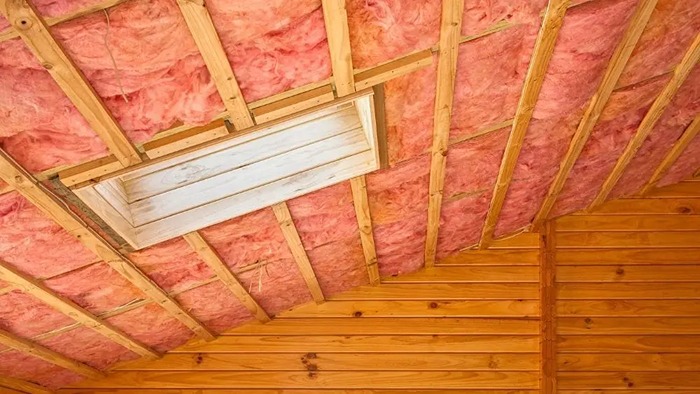
Insulation plays a vital role in optimizing indoor comfort and maintaining a consistent climate within a home, all while significantly enhancing its energy efficiency. A crucial factor to consider when choosing insulation is its thermal performance, commonly measured by its R-value, which indicates its resistance to heat transfer. Typically, homes are insulated in all exterior walls, as well as in the attic and any floors situated above unfinished basements or crawl spaces. By strategically installing insulation in these areas, homeowners can enjoy improved thermal regulation and reduced energy consumption.
In new homes, the most frequently utilized insulation types include fiberglass, cellulose, and foam. However, the specific choice of insulation materials can vary depending on the region and climate. Builders may opt for alternatives such as mineral wool (also known as rock wool or slag wool), concrete blocks, foam boards or rigid foam, insulating concrete forms, spray foam, or structural insulated panels, based on the specific requirements and conditions of the construction project. These diverse options allow builders to tailor the insulation approach to maximize energy efficiency and meet the unique needs of the home.
In new home construction, blanket insulation is commonly used and is available in the form of batts or rolls. Additionally, loose-fill and blown-in insulation made from fiberglass, cellulose, or mineral wool particles are also prevalent choices. Another option is liquid foam insulation, which can be applied through spraying, foaming in place, injection, or pouring. While liquid foam insulation may have a higher cost compared to traditional batt insulation, it offers double the thermal resistance (R-value) per inch and has the ability to fill even the tiniest cavities, effectively creating an air barrier. This versatility and enhanced performance make liquid foam insulation an attractive option for maximizing energy efficiency and reducing air infiltration in new homes.
In new construction, fiberglass and mineral wool batts and rolls are commonly used for insulating walls, attics, floors, crawl spaces, cathedral ceilings, and basements. To provide additional benefits, manufacturers often incorporate a facing material like kraft paper or foil kraft paper, which serves as a vapor and air barrier. In situations where the insulation will be visible, such as basement walls, the batts may feature a specialized flame-resistant facing for added safety.
Timeline
The duration for insulating an entire house typically ranges from one to two weeks on average. It is essential to consider both the size of the home and the specific type of insulation being used when estimating the timeline for this process.
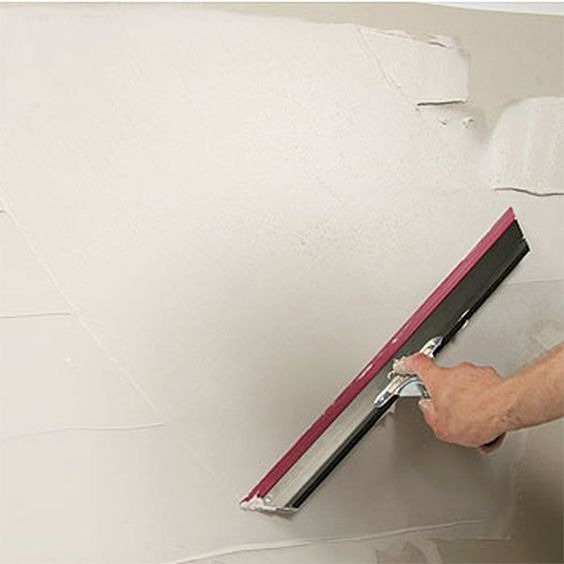
5: Finish Drywall & Install Fixtures; Begin Exterior Finishes
Drywall is installed and taped
The interior walls are lined with drywall, ensuring the seams between the boards are concealed, and any desired texturing is applied.
- The initial coat of paint, known as the primer, is applied.
- The installation of exterior finishes is carried out.
Timeline
As the framework is erected and the walls start to shape, the construction process accelerates. The duration of this step varies, ranging from a few days to several weeks, contingent upon the home’s scale and intricacy.
6: Refine Interior Trim; Establish Exterior Walkways and Driveway
Install Doors, Window Sills, and Decorative Trim
Install Interior Doors, Baseboards, Door Casings, Windowsills, Moldings, Stair Balusters, and Decorative Trim
- Install Cabinets, Vanities, and Fireplace Mantels.
- Apply the Final Coat of Paint.
Additionally, during this stage, the construction team focuses on forming the driveway, walkways, and patios on the exterior of the house. It is common for builders to delay pouring the driveway until the later stages of the project to prevent any potential damage from heavy equipment. However, some builders opt to pour the driveway as soon as the foundation is finished to ensure a cleaner site for homeowners to visit without getting their shoes muddy.

Timeline
At this stage, multiple tasks start to converge simultaneously. The installation of flooring, trim, driveways, and walkways can typically span a period of approximately one to two months.
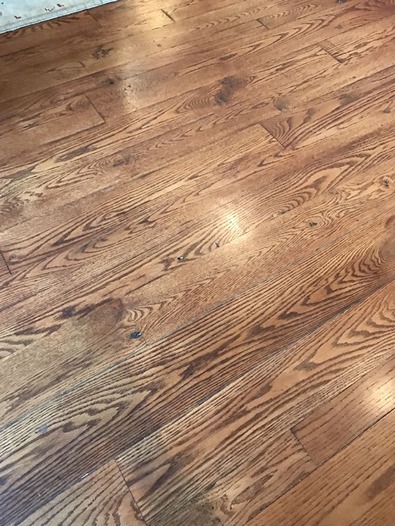
7: Finish Flooring and Countertop Installation, Complete Exterior Grading
- Install ceramic tile, vinyl, and wood flooring, and countertops.
- Finish exterior grading for proper drainage and landscaping preparation.
Timeline
The installation of flooring and countertops often coincides with the assembly of trim and cabinetry, allowing these elements to come together simultaneously. Meanwhile, the process of exterior grading, which ensures proper drainage and prepares the yard for landscaping, can typically take several days, depending on factors such as crew size and weather conditions.
8: Complete Final Mechanical Trims; Install Bathroom Fixtures
- Install Light Fixtures, Outlets, and Switches; Complete Electrical Panel Installation.
- Install HVAC Equipment and Complete Registers.
- Place Sinks, Toilets, and Faucets.
Timeline
After the completion of the major construction work, adding the final details to give it a homely appearance typically requires only a few weeks.
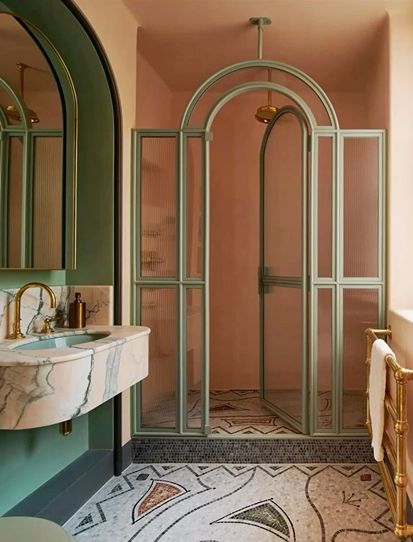
9: Install Mirrors and Shower Doors; Complete Flooring and Outdoor Landscaping
- Mirrors and shower doors are installed, followed by the installation of carpeting. The final cleanup of the construction site is conducted.
- Trees, shrubs, and grass are planted, and the remaining exterior landscaping is completed.
Timeline
Once the interior work is completed, the final cleanup process typically takes approximately one week. Simultaneously, the exterior landscape is carefully designed and implemented to enhance the overall beauty of the house, ensuring it is as appealing on the outside as it is on the inside.
10: Final Inspection and Walk-Through
During the final walk-through of your new home, your builder will guide you through each area and feature, ensuring that you become familiar with its functionalities and the operation of various systems and components. This walkthrough, also known as a pre-settlement walk-through, serves multiple purposes. Firstly, it allows the builder to explain your responsibilities regarding maintenance, upkeep, and warranty coverage. Secondly, it provides an opportunity to identify any items that require correction or adjustment, so it’s essential to be attentive and observant during this process.
Take the time to thoroughly inspect the surfaces of countertops, fixtures, floors, and walls for any signs of possible damage. This careful examination helps prevent potential disputes that may arise when homeowners discover issues, such as a gouge in a countertop, after they have already moved in. Often, it becomes challenging to determine whether such damage was caused by the builder’s crew or the homeowner’s movers, so documenting any concerns during the walk-through is crucial.
By actively participating in the final walk-through, you can ensure that any necessary corrections or adjustments are addressed before the settlement, allowing you to fully enjoy your new home with confidence.
Timeline
The completion of the final walk-through may require several days to ensure a thorough assessment.