How to Build a House in an Unchallenging Way
To effectively manage your project and stay on top of the schedule as your house is being built, it is essential to understand the process step by step. By comprehensively understanding each stage of how to build a house, you can anticipate and ensure a smooth progression of the project. This understanding is particularly valuable whether you are taking on the role of project manager or delegating responsibilities to other team members.
Being aware of what to expect at each stage of how to build a house will provide you with confidence and enable you to engage with trades people at specific points during the construction process. This familiarity with the overall build process will help you feel more comfortable, allowing you to effectively communicate and collaborate with various trades and professionals involved in the project.
When acting as your own project manager or undertaking any of the construction works you, understanding how to build a house step-by-step becomes even more crucial. This knowledge ensures that you can effectively coordinate the arrival of materials and the contracting of trades at the right time. By staying organized and well-informed about the construction process, you can facilitate a smooth build and avoid unnecessary delays or complications.
Introduction
The construction process of how to build a house consists of two main stages: the pre-weather tight stage and the post-weather tight stage, also known as “getting a house to shell.” The weather tight stage is reached when the walls, roof, windows, and doors are installed, and the house is fully lockable, resembling a finished structure from the outside.
For beginners learning how to build a house, achieving the weather tight stage is often the most exciting part of the process. It signifies significant progress as all the heavy construction work is completed and visible advancements can be seen almost daily. Depending on the size and complexity of the house, builders typically aim to achieve the weather tight stage within three to six months.
Once a house is weather tight, the interior work can begin. However, due to the intricacies involved, there is a complex schedule to follow. For example, certain trades, like plasterers, cannot work simultaneously with initial electrical installations. Consequently, this phase of the process can sometimes be time-consuming.
In total, the journey of learning how to build a house, from breaking ground (the initial excavation for foundation trenches) to moving into the finished house, usually takes between six and 12 months. However, the timeline can vary significantly depending on factors such as the project approach. Some timber frame package companies claim they can deliver a ready-to-live-in house within six months, while DIY self-builders may take three or more years to complete their projects.
Although the schedule can differ based on individual circumstances, below is a comprehensive step-by-step guide on how to build a house that provides a clear understanding of the stages involved, from breaking ground to the final sign-off. This overview will help you grasp the overall progression of the house construction process.
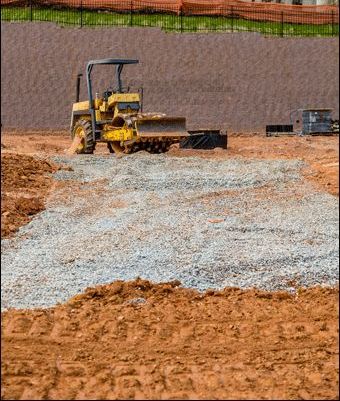
1: Preparing the Site for House Construction
Assuming you have acquired your plot and completed all the necessary planning and preparatory work, the initial step in building a house is to prepare the site. This crucial stage involves various tasks, including site clearance, ensuring the availability of essential facilities, and setting up the necessary infrastructure for your tradespeople.
Here is an overview of the activities involved in this pre-build phase:
- Ground workers establish site access
- Clear the site and store retained material out of the way
- Set up the site hut with drawings and safety equipment
- Install the toilet
- Position the lock-up/lorry container securely
- Water board brings supply to boundary stopcock
- Plumber connects the water standpipe
- Surveyor marks out the building and transfers lines to profiles away from construction
- Bring in and stack bricks and blocks clear of future construction
- Set up the mixer station near the cement store and sand heap
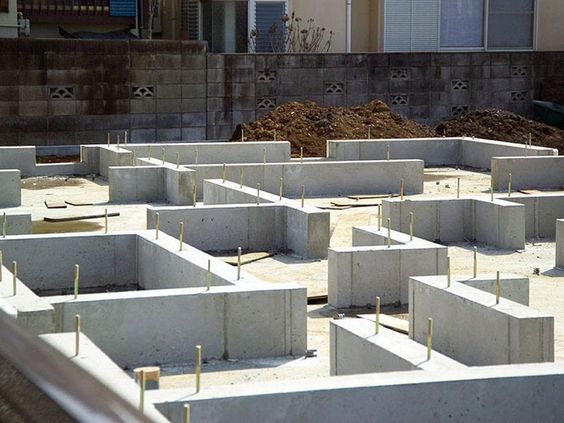
2: Establishing the Base: Foundation Construction for Building a House
Moving forward, the next crucial step is to commence the foundation construction. Establishing a solid foundation is a significant aspect of any self-build project, as it can greatly impact both the budget and timeline. To maintain control over these factors, it is essential to determine the most suitable foundation system early on in the process.
Once the optimal and cost-effective solution is identified through a geotechnical study, which involves examining the site through trial holes or borings, you can proceed with laying the foundations on your prepared site.
Here is an outline of the tasks involved in this stage:
- Excavate the foundations with the assistance of ground workers
- Await approval from building control and warranty inspectors
- Position reinforcement bars, mesh, or cages in the trenches as required
- Place any compressible material or slip membranes within the trenches
- Lay ducts to accommodate services entering through the foundations
- Set up foot scaffold if necessary and prepare shuttering for any steps in the foundations
- Pour concrete footings and compact it to achieve a level surface
- Obtain approval from building/warranty inspectors to proceed
- Construct the foundation block work up to the damp-proof course, employing the expertise of bricklayers
- Install cranked air vents for ventilation
- Incorporate drainage exit lintels into the structure
- Fill cavities with lean-mix concrete to align with the external ground level
- Install damp-proof courses, ensuring appropriate connections with any radon membranes or barriers
By following these steps diligently, you will establish a sturdy foundation for your house, setting the stage for the rest of the construction process.
3: Constructing the structure: Building the Framework of a House
- Ground workers excavate service trenches and install pipes and ducts to planned stopcock/meter locations
- Deliver and position concrete floor beams for each bay
- Install drainage and vent pipes above the oversite
- Fill the floor beams with blocks
- Place coursing blocks and position ventilator grilles
- Brush grout.
- Schedule building control / warranty inspection
- Begin construction of the superstructure
- Install templates for future windows and doors
- Require the first scaffolding lift
Continue Building the Structure
- Ground workers excavate trenches for service pipes and lay them to the proposed stopcock/meter positions
- Concrete floor beams are loaded and positioned in each bay
- Drainage and vent pipes are installed above the oversite
- Floor beams are filled with blocks to complete the structure
- Coursing blocks are laid, and ventilator grilles are positioned
- Grout is brushed to ensure a clean and neat finish
- Building control/warranty inspection is arranged
- Construction of the superstructure begins
- Templates for future windows and doors are installed
- The first lift of scaffolding is required
- Cranes are arranged to lift first-floor beams onto each bay, if necessary
- Plasterboard batten clips are positioned
- Infill blocks are laid
- Grout is brushed

Constructing the Wallplate
- Progress the superstructure construction up to the wallplate level
- Arrange for the third and fourth scaffolding lifts as needed
- Prepare the wall plate by scarfing, bedding, and securing it with appropriate wallplate straps
- Ensure a warranty inspection is conducted, if necessary
- Have carpenters construct end trusses based on templates
- Continue building up the gable ends and chimney
- Coordinate additional scaffolding lifts for the gable ends
- Have the plumber install lead flashings, trays, and skirts for the chimney
- Ensure the plumber fits vent pipes and flashing skirts as they penetrate the roof
- Complete the chimney by topping it out and installing the chimney pot
- Assign bricklayers to point the chimney flashings
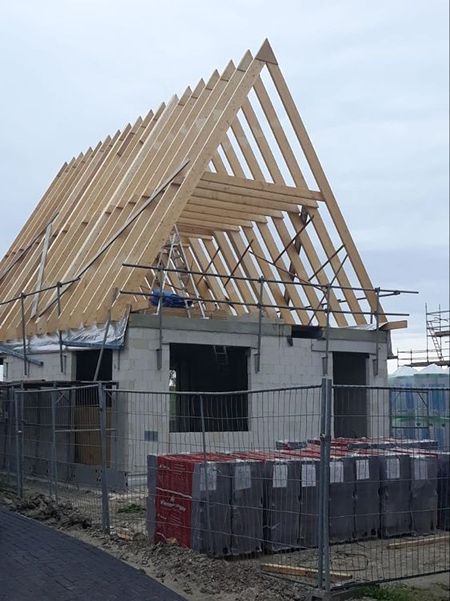
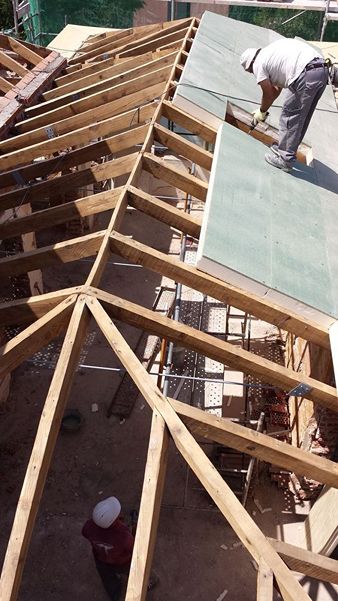
4: Roof Construction for Building a House
As your house takes shape, the next crucial step is the construction of the roof.
- Carpenters secure roof trusses to the wall plate
- Binders and bracing are fixed at key points for structural stability
- Lay boards are installed in valleys for additional support
- Dormers, if included, are constructed
- Fascia, soffit, and necessary ventilation grilles or strips are fitted
- A warranty inspection may be conducted
- Roof tanks, if required, are installed
Installing the Roof Covering During House Construction
- Roofers start by cutting and installing under cloaking along the verges
- The roofers proceed with the process of felting and battening
- Tiles or slates are carefully laid on the roof
- Ridge and hip tiles are positioned and securely bedded
- Valleys can be tiled, or fiberglass or lead valleys are installed
- The plumber takes care of dressing down flashings and skirtings
- Decorators then paint or stain the fascia’s, soffits, and barges to complete the aesthetic appeal
5: Exterior and Interior Fittings in House Construction
After completing the superstructure, the subsequent stage entails specific interior and exterior tasks, including window installation and the construction of stud wall partitions.
- Plumbers install guttering
- Window suppliers fit external joinery
- Plasterers perform external rendering if required
- Scaffolding is removed
- Plumbers fit downpipes and connect them to drainage upstands / gullies
- External decoration is carried out
- Carpenters begin the first fix by installing door linings, constructing studwork partitions, and fixing window boards
- Carpenters install plasterboard noggins and box in vent pipes
- Plumbers and carpenters coordinate for the construction of necessary stands in the roof
- Carpenters fix the loft trap
6: Initial Installation Phase in House Construction
- Install flooring membrane and insulation, ensuring joints are taped and sealed up to the damp-proof course
- Lay and secure under floor heating (UFH) loops
- Complete the first fix plumbing for hot and cold water and waste within the floor zones
- Install internal gas pipe work
- Bring UFH pipe work to manifolds and outlet positions
- Hire a supply and fix company to pump and level the floor screed, allowing it to set for three days
- Lay protective hardboard or cardboard over the screed
- Install carcass wiring for lighting and power circuits, including all back plates
- Position the consumer unit(s)
- Route wiring to external lighting points
- Install TV aerial/satellite cables in the desired locations
- Install internal telephone wiring as needed
- Prepare cacassing for home entertainment, smart systems, and alarms
7: External Drainage and Site Works
Excavation of trenches for drainage runs initiated by ground workers.
- Ground workers initiate the excavation of trenches for drainage runs
- Trenches are filled to a depth of 150mm with pea shingle
- Drains are laid according to the required falls
- Brick or concrete section manholes are constructed, or purpose-made manholes, rodding eyes, and gullies are installed along the runs
- The laid drains are inspected and approved by the building inspector
- Pea shingle is used to haunch over the drains
- Drainage trenches are backfilled
- Approved contractors are responsible for connecting the system to the main sewer in the road
- Carpenters complete the boxing and noggins, preparing them for the plasterer
- Ground workers commence the construction of driveways and pathways
- Bricklayers are tasked with building any fireplaces and hearths
- The gas meter is installed and connected
- Plumbers and electricians coordinate their efforts regarding cross bonding and earthing
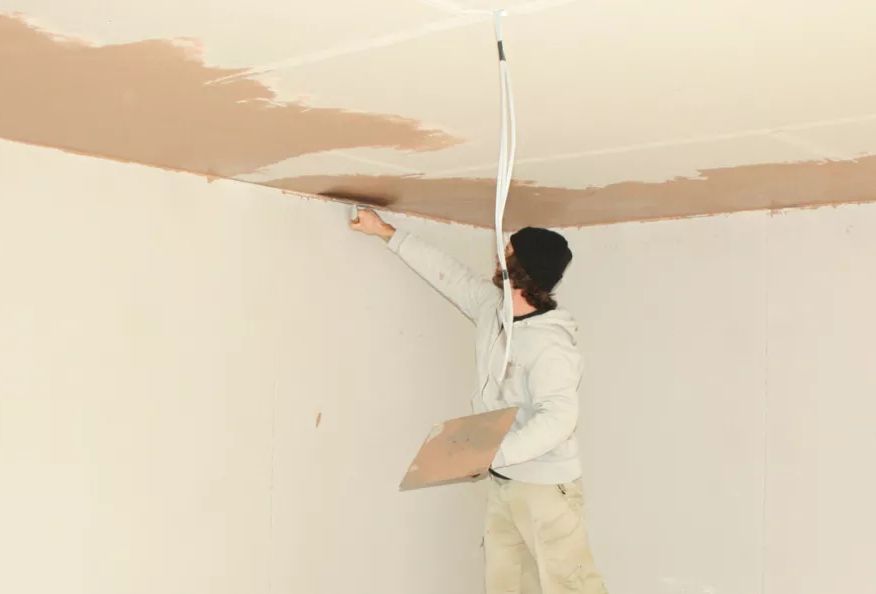
8: Ceiling and Dry Lining Preparation
- Installation of the Main Staircase by the Carpenter and Protective Covering
- Securing Ceilings with Tacks by Dry liners/Plasterers
- Plasterboard Lining on External and Block work Walls with Dots and Dabs
- Plasterboard Tacking on Studwork Walls and Pipe Boxings
- Filling and Scrim Taping of Joints and Angles
- Jointing of Abutments between Different Materials using Mesh
- Application of Internal and External Mastic Sealant on all Joinery
- Skim Coating of Walls and Ceilings by Dryliners/Plasterers
- Painting/Treating the Backs of Skirting and Architraves by the Decorator
- Installation of Roofing Insulation
9: Refining Carpentry Installations
Now is the scheduled phase to incorporate the finer elements, including architraves, skirting, and flooring.
- Internal doors to be installed by carpenters
- Carpenters to fit skirting and architrave
- Installation of bottom treads of the staircase, along with fitting of balustrading and handrails, as well as linen cupboard shelving
- Fitting of loft door and ladder
- Carpenters or specialists to lay timber floors and apply protective measures
- Specialist tillers to lay ceramic floor tiles and apply protective measures
- Installation or construction of built-in bedroom and bathroom furniture by carpenters or specialist suppliers
- Fitting of kitchen units
10: Refining Electrical and Plumbing Installations in the Second Fix Stage
During the second fix stage, all electrical and plumbing components are wired and connected.
- All wiring should be connected to the consumer unit
- The boiler needs to be positioned, plumbed, and then wired in
- Sink units should be plumbed in, earthed, and cross bonded
- All sanitary ware needs to be fitted and plumbed in
- Radiators and towel rails should be fitted and plumbed in
- Connect the under floor heating loops to the manifolds
- The electrician should check cross bonding and earthing to all sanitary ware, sinks, radiators, etc
- Wire in the boiler, including control systems and room thermostats
- The plumber and electrician should attend the firing up and commissioning of the boiler
- Flush through all pipe work and connections and perform pressure testing
- Leave the central heating on ‘test’ mode
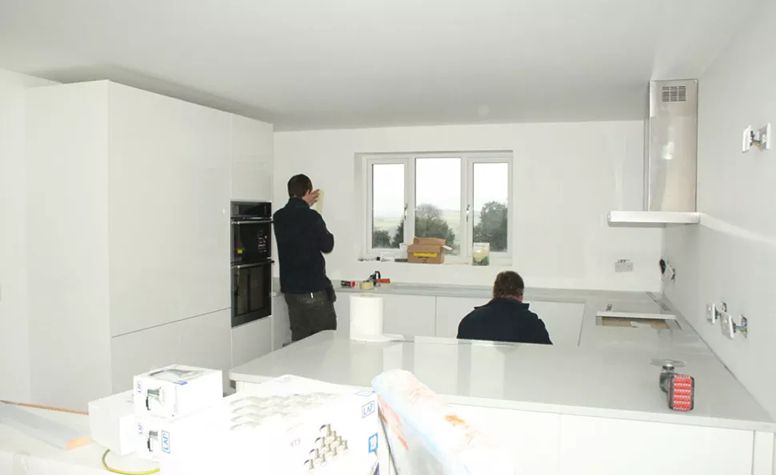
11: Decoration
At this stage, individuals who have opted for a package company or main contractor to construct their house may decide to assume responsibility for the decorating tasks.
Undertaking these smaller tasks towards the conclusion of the building project is a practical approach, especially if the budget has been exceeded. However, it is crucial to only undertake jobs that align with your skills and capabilities to avoid the need for costly professional corrections.
- Fitting of worktops, using templates previously taken
- Thorough cleaning of the house, ensuring all debris and dust are removed outside
- Decorators to inspect and rectify any holes, blemishes, or rough patches on walls
- Smoothing or wire wool rubbing down of internal timber surfaces
- Painting of all walls and ceilings by decorators, applying a mist coat followed by two coats of emulsion
- Treatment of internal timber, including knotting, painting, priming, undercoating, and applying a top coat glaze, or staining with a two-coat finish
- Specialist tillers to install ceramic wall tiles in the kitchen and utility areas
- Filling of baths to allow for settling before tillers fix any wall or splash back tiles
- Installation of a water meter
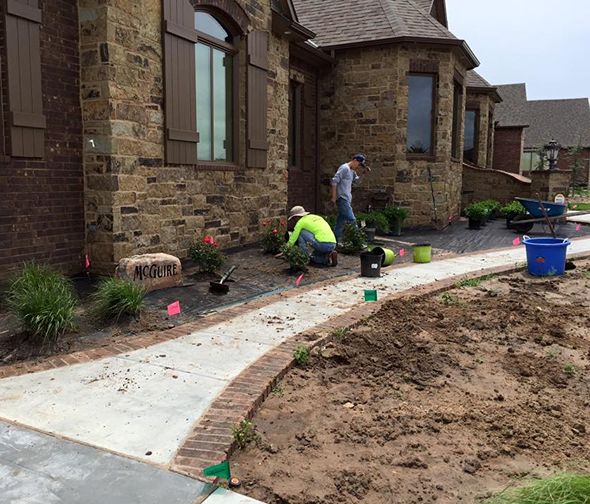
12: Landscaping
Some self builders opt for a break after completing the house before focusing on the landscaping if they have budget constraints. However, there are potential advantages to undertaking landscaping concurrently with the house construction, so it’s crucial to carefully consider your preferences and who will be responsible for the work.
- Level the ground and prepare it, carried out by ground workers or landscape gardeners
- Place the topsoil from storage in the required areas, with additional shipment if necessary
- Remove or relocate the site hut if it is intended for use as a garden shed
- Sell off or return the secure site storage to the hirers
- Have ground workers complete the driveway surface
- Lay patio slabs
- Have bricklayers construct any required dwarf or decorative walling
- Level the lawned areas in preparation for seeding or turfing
- Assign approved contractors to complete any bellmouth and kerbing work on the road
13: Last Phase of Constructing a House
And the moment has arrived! Only a few remaining tasks left to accomplish before the move-in day…
- Thoroughly clean the entire house
- Polish all windows and remove labels from glass and appliances
- Remove all polystyrene packing from cookers
- Remove all stabilizing bolts from washing machines and dryers
- Off-hire the site toilet and any remaining hired plant
- Take readings on all meters
- Switch the central heating to ‘run’ mode
- Arrange for the telephone company to connect the service
- Install TV aerials and/or satellite dishes
- Address any remaining items on the snagging list with the contractors
- Lay carpets
- Notify the local authority of completion for council tax valuation purposes
- Prepare and send the Energy Performance Certificate to building control
- Conduct the final inspection by building control and issue the Completion Certificate
- Perform the final inspection by the warranty inspector and issue the warranty
- Arrange protective covering for floor surfaces prior to furniture delivery
- Switch the self-build site insurance policy to a homeowners’ policy