How to Build an Easy, Multi-Functional Daybed
- Working Time:3 – 5 hrs
- Total Time:1 – 2 days
- Yield:1 daybed
- Skill Level: Intermediate
- Estimated Cost:$150 to $250
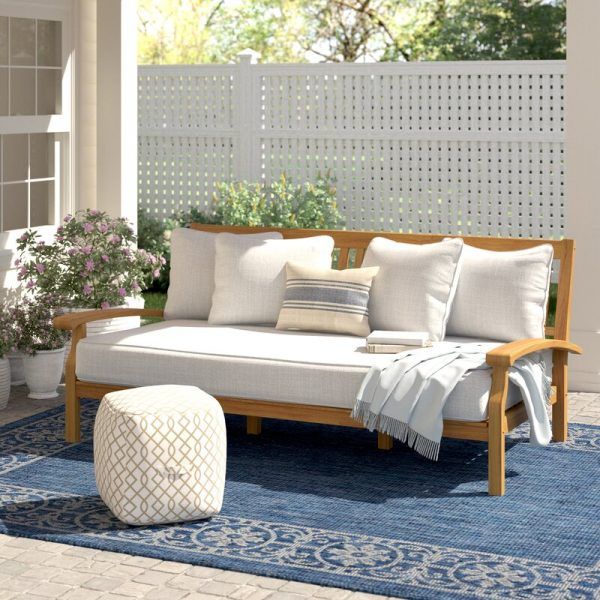
A daybed is multi-functional and versatile, dedicated to a wide range of activities. A daybed is ideal for lounging, reclining, reading, and chatting. The back pillows can be removed to allow for daytime naps, and at night, it can even serve as an extra bed.
A daybed is similar to a couch, with a low backrest and two side arms. However, daybed is distinguished by its deep seat, which is a minimum of 39 inches deep and large enough to accommodate a twin-size mattress. Some daybed is even deeper than that.
This DIY daybed was inspired by a daybed found at a resort on KoLanta Island in Thailand. It features clean, simple lines that are evocative of elegant, rustic furniture commonly found in tropical regions. This daybed is designed to accommodate a standard twin-size mattress measuring 38 inches by 75 inches.
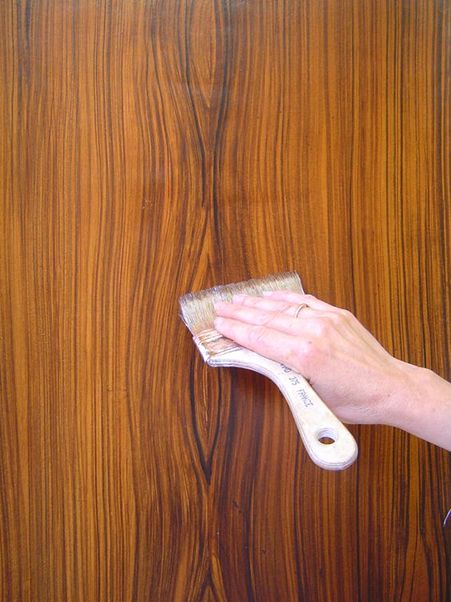
To make the less expensive softwood two-by-fours of the daybed look similar to hardwood, you can apply a carefully selected wood stain. Water-based polyurethane coating can then be used to protect the wood of the daybed while maintaining a soft, velvety texture. However, if you prefer a harder, shell-like feel, oil-based coatings can be used on the wood of the daybed.

Safety Considerations
When cutting the lumber for the daybed, it is essential to use an electric miter saw. It is crucial to follow all safety precautions for the miter saw to ensure safe operation.

List of Required Materials
Equipment / Tools
- Electric miter saw
- Random orbital sander
- Drill
- Drill bit set
- Countersink bits
- Tape measure
- Speed Square
- Carpenter’s C-clamps
- Tack cloth
- Staining pads
- Sandpaper, #120 and #220
Materials
- 12 two-by-fours
- 5 one-by-fours
- 2-inch screws
- 2-1/2-inch screws
- 3-inch screws
- Wood stain
- Pre-stain wood conditioner
- Polyurethane wood sealant, water-based
Instructions
1. Cutting the Wood
Cut the wood according to the measurements in the chart below:
Part A
- Lumber: 2×4
- Length: 39inches
- Quantity: 2
- Purpose: Arrange the platform edges of the seat
Part B
- Lumber: 2×4
- Length: 76inches
- Quantity: 2
- Purpose: Arrange the front and rear sections of the seat platform
Part C
- Lumber: 2×4
- Length: 36inches
- Quantity: 7
- Purpose: Arrange the slats on the inner part of the seat platform
Part D
- Lumber: 2×4
- Length: 39inches
- Quantity: 2
- Purpose: Arrange the lower portion of the side support
Part E
- Lumber: 2×4
- Length: 39inches
- Quantity: 2
- Purpose: Arrange the upper portion of the side support (armrests)
Part F
- Lumber: 2×4
- Length: 30inches
- Quantity: 4
- Purpose: Arrange the vertical components of the side support
Part G
- Lumber: 2×4
- Length: 36inches
- Quantity: 2
- Purpose: Arrange the cross-braces for the side support
Part H
- Lumber: 2×4
- Length: 43inches
- Quantity: 2
- Purpose: Arrange the vertical components of the seat back
Part I
- Lumber: 1×4
- Length: 76inches
- Quantity: 5
- Purpose: Arrange the horizontal slats for the seat back
2. Construct the Frame for the Seat Platform
Position the two platform side pieces (A) in a parallel manner with a distance of 73 inches apart from each other.
Create a rectangle by placing the platform front and back pieces (B) between the two side pieces.
Utilize a drill to make pilot holes into the outer sides of the side pieces, where the front and back pieces meet the sides.
Use 3-inch screws to fasten all pieces together, with two screws per attachment point.
3. Install the Inner Slats to the Seat Platform
Use a tape measure and pencil to mark 9-1/8-inch increments on the top of the platform front and back pieces (B), but not on the side pieces (A).
Insert the seat platform inner slats (C) between the long front and back pieces, making sure to center each slat on the pencil marks. For now, insert only the middle five slats, leaving off the two end slats.
Drill pilot holes and then use 3-inch screws to attach the slats in place. Use two screws per attachment point, for a total of 14 screws.
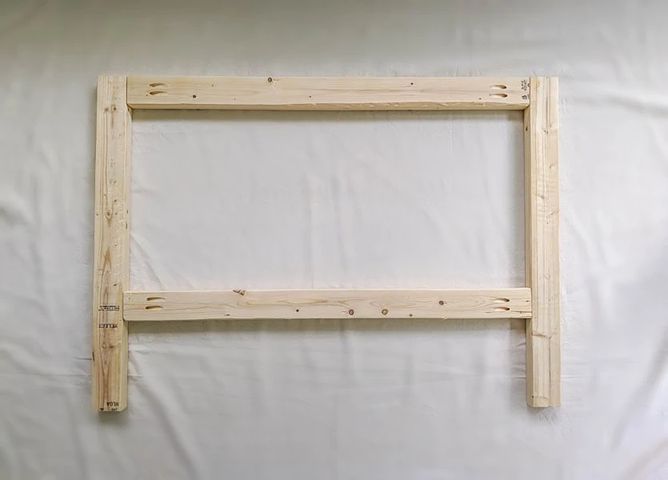
4. Construct the Perimeter for Side Supports
The top edges of the two side supports serve as armrests and they hold the seat platform of the daybed in place.
Position a side support bottom (D) parallel to and 30 inches apart from a side support top (E).
Place two vertical side supports (F) perpendicular to and between the previous two boards, one at each end.
Use screws to connect the boards and form a rectangular shape.
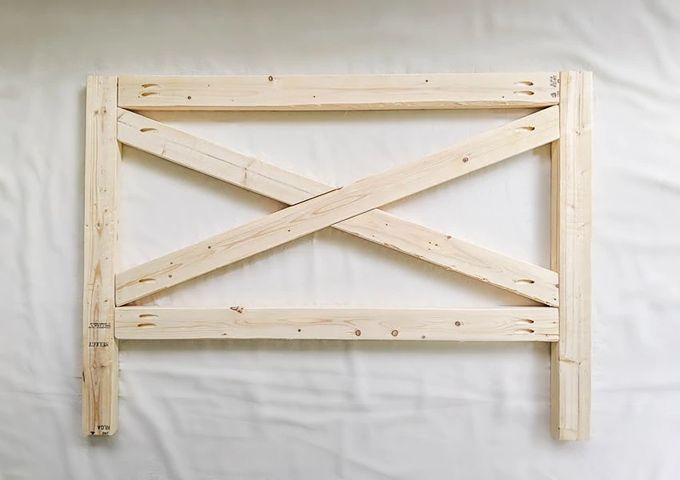
5. Install Cross Brace on the Side Support
To help attach the seat platform of the daybed to the side support, there is a cross brace located 20 inches above the floor on the side support.
Use the tape measure, measure 20 inches from the end of the side support bottom (D) on both sides.
Place the side support cross brace (G) between the two pencil marks, centering the brace on the marks.
Slide the cross brace so that it is flush with the edges of the side support vertical pieces.
Create pilot holes and add screws to attach the cross brace to the side support.
6. Construct the Second Side Support
To construct a second side support of the daybed, follow the same steps as the first side support for building the perimeter and adding the cross brace.
Ensure that both side supports have identical dimensions. If needed, use the first side support as a reference.
7. Installing the Seat Platform onto the Side Supports
Raise the seat platform of the daybed to the height of the cross braces by placing it on boxes or a stack of books.
Conceal the screws by drilling from the inside of the seat platform when attaching it to the side supports. Use 2-1/2-inch screws and put four screws per side.
Take off the supports.
8. Install the Remaining Seat Slats
Insert the two end seat platform slats of the daybed that were left out earlier.
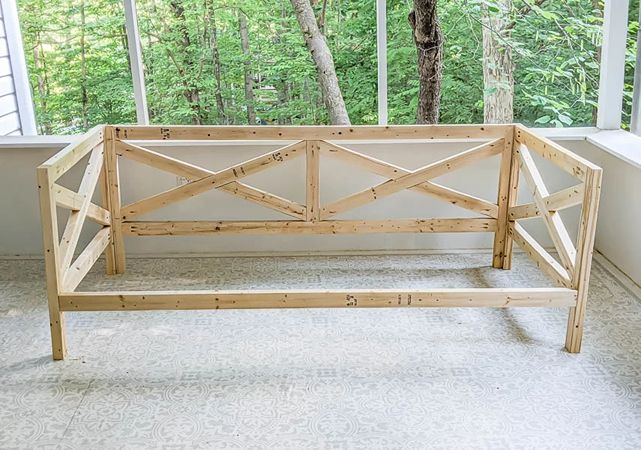
9. Install the Vertical Pieces for the Seat Back
Select one of the long sides of the daybed to serve as the backrest.
Secure one of the seat back vertical pieces (H) to one of the side support vertical pieces using a clamp, ensuring that the bottoms are aligned.
Starting from the back, fasten the two boards together using six 2-1/2-inch screws.
Repeat the process on the other side of the daybed.
10. Install the Seat Back Slats onto the Vertical Pieces
Use a clamp to secure one of the seat back horizontal slats (I) to the tops of the seat back vertical pieces.
Screw the seat back slat into place using 2-inch screws, two screws per side.
Add four more seat slats, spacing them 1/2-inch apart.
Maintain the same 1/2-inch spacing between the upper and bottom slats of the daybed while adding the bottom slat. However, there may be a gap of 1 to 3 inches between the bottom slat and the seat platform of the daybed, which does not require filling.
11. Refine the Edges and Corners
To smooth out the edges and corners of the daybed, use a random orbital sander with #120 grit sand paper. The amount of wood that you round off will depend on the desired look. If you prefer a crisp, well-defined look, sand off as little wood as possible. If you prefer a more weathered or antique appearance, work the edges and corners more extensively.
12. Sand the Wood
If there are any rough spots on the flat surfaces of the daybed, sand them with #120 grit sandpaper. However, for the most part, use #220 grit sandpaper to sand the flat surfaces of the daybed.
13. Applying Conditioner to the Wood
After removing sawdust using a tack cloth, apply pre-stain wood conditioner to all surfaces of the daybed using either a staining pad or brush.
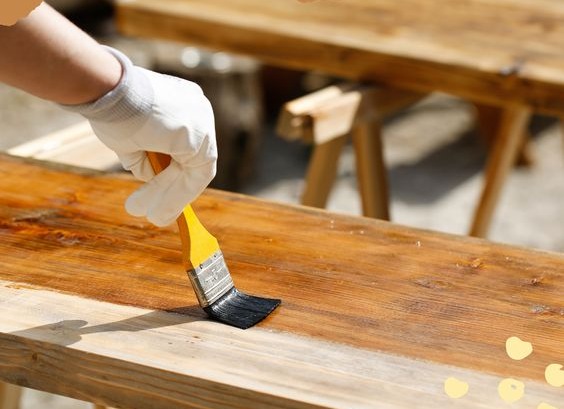
14. Apply Wood Stain
Using staining pads, apply wood stain to all parts of the daybed. Instead of applying one or two heavy coats, use several light coats for a better finish on the daybed.
15. Seal the Wood
Apply a water-based polyurethane wood sealer to the daybed to protect and enhance the color of the wood stain. It’s recommended to apply at least three coats to the daybed since water-based sealers are very light.
16. Complete the DIY Daybed
Place a twin size mattress on the daybed (avoid using a twin XL mattress) and cover it. Add a backrest made of three or four large couch pillows.