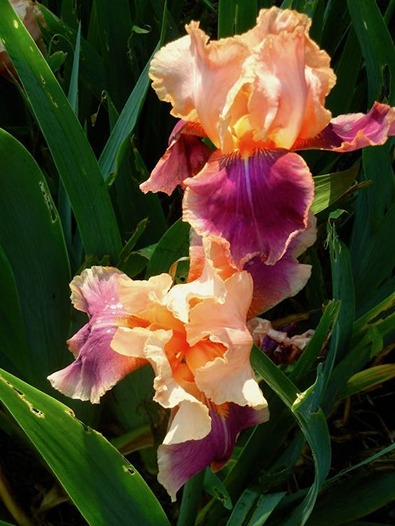
How to Grow Bearded Iris: Easy Tips
The Iris genus stands out among flowers due to its remarkable diversity and wide distribution. It encompasses several distinct groups, each with its own set of unique cultural requirements. If you’re wondering how to grow Bearded Iris, you’ll find that despite their differences, all irises share common characteristics such as sword-like leaves and flowers with six lobes that either spread or droop.
However, depending on the group they belong to, irises can grow from creeping rhizomes or bulb structures. Additionally, irises are further categorized as “bearded,” “beardless,” or “crested.”
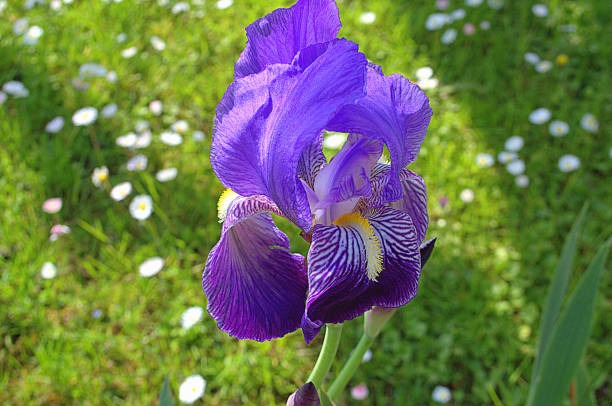
Among the beardless iris varieties, some notable ones include the Japanese, Dutch, and Siberian irises. These plants lack the distinctive beard-like structures found on their counterparts. However, how to grow Bearded Iris: the bearded iris, scientifically known as Iris germanica, holds a special place as it is arguably the most popular and easiest to cultivate.
When starting with nursery-grown plants, the bearded iris is typically planted during the spring season, and it blooms within its first year of growth. On the other hand, how to grow Bearded Iris: if you opt for bare root plants, they can be planted either in the fall or the spring. However, bare root irises might not produce robust flowers until their second year of growth.
Common Name: Bearded iris
Botanical Name: Iris germanica
Family: Iridaceae
Plant Type: Herbaceous, perennial
Soil Type: Average, well-draining
Bloom Time: Spring
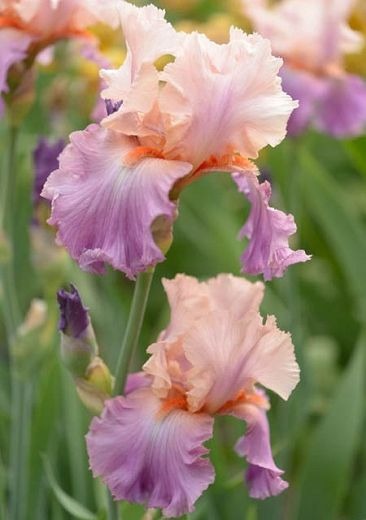
Flower Color: Red, orange, yellow, blue, purple, brown, white, pink, many bicolors
Hardiness Zones: 3–9 (USDA)
Mature Size: 12–40 in. tall, 1 –2 ft. wide
Sun Exposure: Full
Native Area: Southern Europe and the Mediterranean
Toxicity: Toxic to dogs and cats
Bearded Iris Care
Bearded irises, which are highly popular among iris varieties, are known for their ease of cultivation. To ensure successful growth, it is important to select a sunny location with well-drained soil for planting them. However, growing irises differs from cultivating other perennials in one significant aspect: they do not thrive when mulch is applied. The presence of mulch, as well as deep planting, can promote the development of rot in the rhizomes. Therefore, it is advisable to keep the soil around the irises bare. Additionally, to prevent overcrowding and the need for frequent division, it is recommended to space the plants at least 12 inches apart.
While irises generally do not encounter many issues, it is necessary to regularly lift and divide them to address problems caused by iris borer worms and maintain the health and productivity of the plants. This practice helps control the infestation of these pests and ensures the continued vitality of the irises. By undertaking routine lifting and dividing, gardeners can effectively manage any potential threats and promote the longevity and vigor of their iris plants.
Light
For irises to flourish, they require abundant sunlight. Irises grown in areas with full shade tend to exhibit reduced blooming and are more susceptible to various diseases.
Soil
Growing irises in heavy clay soils is not ideal, whereas sandy or gravelly soils provide an excellent environment for their cultivation. If your natural soil composition is predominantly heavy clay, you have the option to plant irises in raised beds. This technique aids in improving drainage for the irises. Alternatively, you can enhance the soil by incorporating gypsum or organic matter such as compost. These amendments help to lighten the soil, creating a more favorable growing medium for irises.
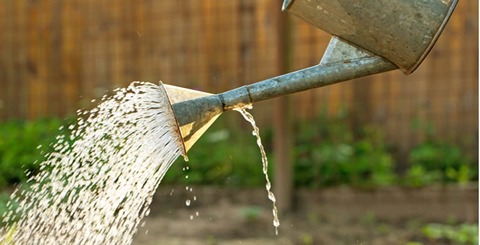
Water
While irises appreciate moisture, it is equally important for them to have adequate drainage to avoid issues related to rot. It is recommended to water the irises when the top 2 inches of the soil feel dry. These plants possess a commendable ability to tolerate periods of drought, further emphasizing their resilience.
Climate and Moisture Level
Irises are renowned for their robust nature. They are unfazed by temperature extremes, as long as the soil provides proper drainage for excess rain or snowmelt. However, irises that endure damage from strong winds or hailstorms can become vulnerable to infestation by iris borer larvae.
Fertilizer
During the spring season, it is advisable to apply a low-nitrogen 6-10-10 fertilizer around your irises. Excessive nitrogen can promote foliage growth while hindering the development of blooms. Another suitable fertilizer option for irises is bone meal, which provides beneficial nutrients for their overall health and vitality.

Types of Bearded Iris
The iris named “Celebration Song” is a tall bearded variety displaying shades of pink and lavender. It reaches a height of 37 inches.
“Abiqua Falls” is a tall bearded iris that boasts a true blue hue and grows up to 39 inches in height.
“Again and Again” is a reblooming iris with yellow blossoms. This tall bearded iris stands at a height of 36 inches.
“American Classic” is an iris variety characterized by white flowers with blue-violet accents. It belongs to the tall bearded category and reaches a height of 36 inches.
“Beatnick” is a dwarf bearded iris that grows to a modest height of 14 inches. It showcases lovely purple flowers adorned with white highlights.
“Big Blue Eyes” is another dwarf bearded iris known for its charming combination of white and violet blooms. It also stands at a height of 14 inches.
“Dusky Challenger” is a striking iris with a deep purple coloration. It grows to an impressive height of 39 inches.
“Thornbird” is an elegant iris variety featuring beautiful yellow flowers and reaching a height of 37 inches.
“Queen’s Circle” displays white flowers accented with fringes of blue-lavender. This iris grows to a height of 32 inches.
“That’s All Folks” is a towering iris variety that reaches an impressive height of 40 inches, showcasing yellow-gold blossoms.
“Jesse’s Song” is a tall bearded iris with a height of 35 inches. It delights with its lovely combination of violet and white petals.
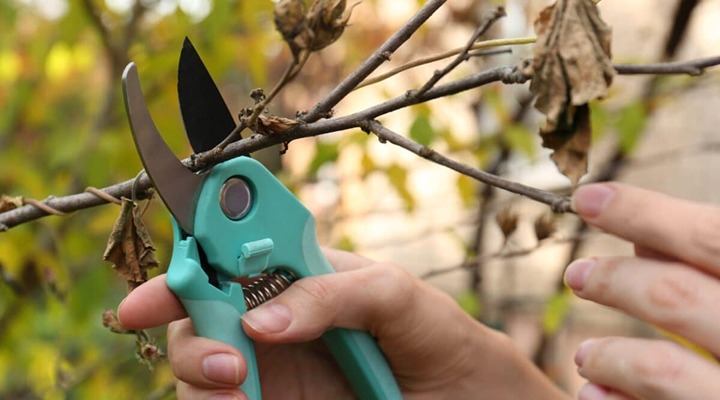
How to Prune Bearded Iris
Prompt removal of faded and withered flowers is essential. This practice can potentially stimulate the production of more blooms or even trigger a subsequent blooming period later in the season.
To maintain the health and vitality of iris plants, it is recommended to dig up and divide clumps of irises every four or five years. This process serves multiple purposes, such as eliminating diseased roots and addressing damage caused by iris borers. By undertaking this division, you not only ensure the continued vigor of your iris plants but also have the opportunity to propagate new individuals.
How to Propagate Bearded Iris
Splitting irises offers dual benefits of expanding your plant collection while maintaining the vitality of your current irises. Below is a guide on how to perform this process:
- In late summer, dig up the rhizomes with a shovel, and shake off all loose soil. Any flower stalks that are still in place can be removed at this time.
- Carefully pull or cut the rhizome cluster apart into sections. Make sure each section has a fan of foliage; you can trim the foliage off at an angle, leaving 3 to 6 inches of leaves intact.
- Examine the root sections closely, and use pruners to cut away any soft, rotten parts. Make sure to cut the roots back past any borer tunnels—you may even encounter living worms, which should be destroyed.
- Replant each root section, just barely covering the rhizome. Space roots at least 12 inches apart; they will quickly fill in the spaces. Water thoroughly upon planting, then weekly until frost sets in. New foliage growth will probably begin in late summer and fall, and the plant will grow vigorously when it returns in the spring.
How to Grow How to Propagate Bearded Iris from Seeds
Seed propagation is primarily undertaken by nursery professionals who aim to create new iris varieties through meticulous cross-pollination. However, it is indeed possible for individuals to grow irises from the small seeds found within the green oval pods that remain after the flowers fade. By collecting these seeds and planting them approximately 1/4-inch deep in the garden, they often germinate and develop into flowering plants within a span of three years.
It’s important to note that the majority of garden irises are hybrids, and plants grown from their seeds typically do not exhibit the exact characteristics of the parent plant. The iris plants propagated from collected seeds may display notable variations in appearance compared to the original mother plant.
In contrast, propagation through division of root clumps is a more common and reliable method. This involves separating and replanting sections of the iris’s root structure, leading to a faster and more predictable means of multiplying the plants.

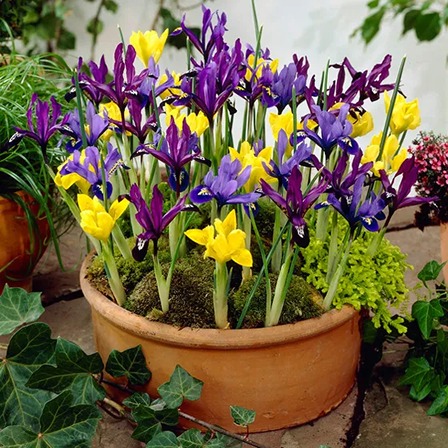
Potting and Repotting Bearded Iris
While not a widely used approach, it is possible to cultivate irises in pots with a minimum width of 12 inches. To create a suitable growing environment, employ a loose potting mix that is free of soil. When planting the irises, ensure that the tops of the rhizomes are either exposed or just lightly covered. It is crucial to avoid overwatering the plants, as excessive moisture can be detrimental.
In colder regions, it may be necessary to relocate the containers to sheltered areas during the winter months to protect the plants and promote their survival. Irises grown in pots might require more frequent division and transplanting compared to those cultivated in the ground. Typically, it is recommended to divide and transplant container-grown irises every other year or so to maintain their vitality and ensure healthy growth.
Overwintering
To maintain a neat appearance in the garden, it is advisable to trim back the foliage fans of irises to approximately 6 inches during the fall season. This practice serves multiple purposes, such as enhancing tidiness, reducing the surface area of leaves that could potentially harbor fungal diseases, and eliminating any caterpillar eggs that may be present. It is important to dispose of all removed foliage properly by destroying it rather than adding it to the compost bin.
In the event that plants exhibit signs of rot or damage caused by borers, it is necessary to dig up the roots and conduct a thorough inspection. This should be done in early fall. Any sections of the roots that show signs of disease or damage from worms should be carefully removed. The remaining healthy root sections can then be replanted. It is ideal to perform this process several weeks prior to the arrival of freezing weather, allowing sufficient time for the roots to reestablish themselves before the onset of frost.
Common Pests and Diseases
The iris borer stands out as the most significant insect pest that affects irises. During spring, caterpillars emerge and burrow through the leaves, eventually reaching the rhizome by summer. The feeding tunnels created by the caterpillars expose the rhizome to bacterial rot, exacerbating the damage. It is crucial to remove all iris leaves following frost to eliminate caterpillar eggs. Additionally, in cases where worms have penetrated the rhizomes, they should be dug up, and the soft, infested sections need to be carefully removed before replanting the remaining pieces. This period of addressing borer damage also presents an excellent opportunity to propagate irises through division.
Among the major disease concerns for irises are bacterial soft rot, crown rot fungus, and fungal leaf spot. The presence of mosaic virus is indicated by mottling on the leaves and flowers. If any of these diseases are identified, it is essential to remove and destroy the affected plant material rather than adding it to compost. Generally, practicing good hygiene measures is sufficient for controlling these diseases, and the use of fungicides is typically unnecessary.
How to Get Bloom
When an iris fails to produce blooms, the underlying cause can typically be attributed to one of the following four reasons:
- Ensure that when you replant divisions, the crown of the rhizomes is only just covered with soil, allowing them to be near the surface.
- Verify that your iris plants are receiving a minimum of six hours of direct sunlight each day to promote healthy blooming.
- Overfeeding irises can lead to an abundance of leaf growth at the expense of flower production. Typically, a single feeding in the spring is sufficient for the nutritional needs of irises.
- When the root clumps become overly dense, it significantly impacts flowering. To combat this, dig up your irises every few years to divide and replant them, providing adequate space for healthy growth and improved blooming.
Common Problems
Distinguished among the array of stunning flowering plants, bearded irises generally thrive without many complications. However, it is still important to remain vigilant regarding the following concerns:
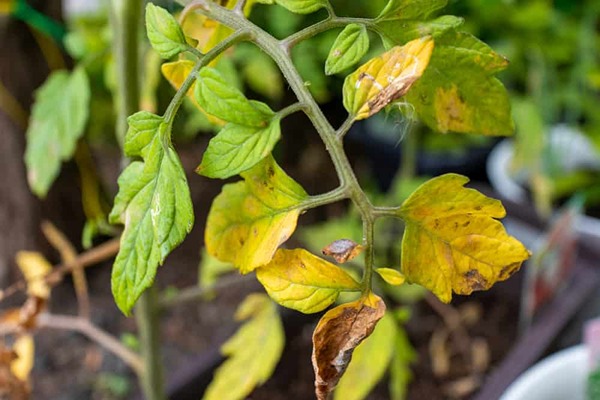
Leaves Turn Yellow or Brown, Fall Over
The presence of root rot, typically indicated by wilting or discolored foliage, is often attributed to overly saturated soil conditions. Alternatively, it may be a consequence of extensive damage caused by iris borers. In such cases, it is advisable to promptly lift the affected root clumps, carefully removing any soft or decaying sections, and subsequently replanting them in soil that offers excellent drainage and porosity.
Flower Stalks Topple Over
Certain varieties of bearded irises can reach impressive heights of up to 40 inches, often necessitating the use of stakes to provide support for their large blossoms. In instances where irises are cultivated in shady environments, they may exhibit elongated stems, further emphasizing the need for staking to maintain their upright growth.
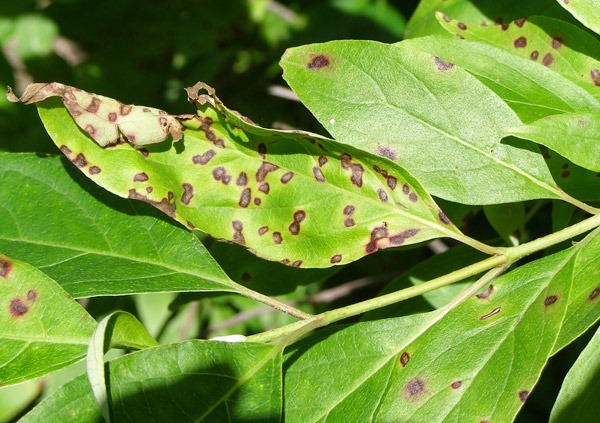
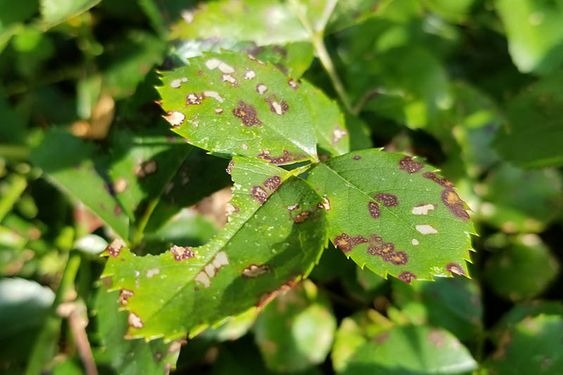
Leaves Have Yellow and Brown Spots
The occurrence of spotted leaves in irises can be attributed to infections caused by bacteria or fungi. Bacterial leaf spot typically initiates at the leaf edges and progressively expands in size. On the other hand, fungal leaf spots manifest on the inner portions of the leaves and do not exhibit enlargement. It is crucial to remove and dispose of the affected plant parts. Maintaining a clean ground area around irises, free from mulch and debris, contributes to effective garden hygiene, which is often sufficient to manage leaf spot diseases. In cases of severe fungal infections, the use of fungicides can be employed for control purposes.