How to Insulate a Shed: A Step-by-Step Guide
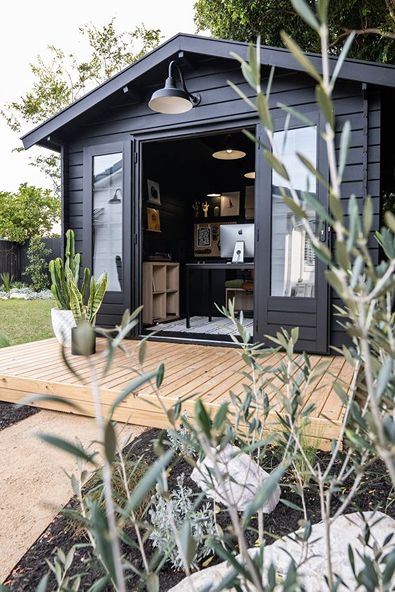
Garden sheds are typically small structures designed to store gardening tools, equipment, and supplies. Due to their size and lack of insulation, they are not well-suited for habitation. This is because they are not nearly as temperate as the inside of a home and the temperature inside is affected by outside temperature fluctuations. How to insulate a shed: As a result, it can be challenging to use a garden shed as an office, yoga studio, or workshop when it’s too cold or too hot.
How to insulate a shed: Fortunately, there is a solution to this problem. Insulating the shed can help maintain a comfortable temperature inside the structure, regardless of the weather outside. This not only improves user comfort but also increases energy efficiency and limits outside noise. In particular, mineral wool is a type of insulation that is remarkably effective at reducing outside noise.
How to insulate a shed – The process of insulating a shed is typically a fast and straightforward do-it-yourself project, due to the size of the structure and its open walls. With the right materials and tools, most sheds can be insulated in a day. The benefits of insulating a shed make it a worthwhile investment for those looking to use their shed as more than just a storage space. How to insulate a shed: Whether you plan to use your shed as a workspace, a quiet retreat, or a place to exercise, insulating it can help make it a more comfortable and functional space.
Materials for shed insulation
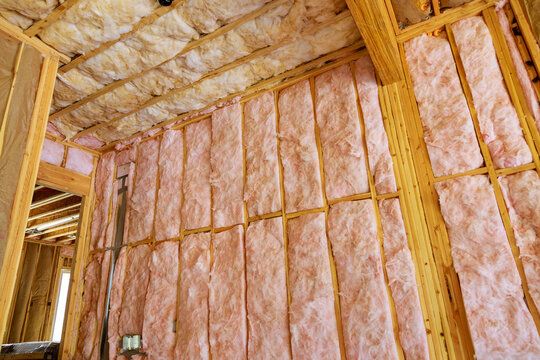
When it comes to insulating wood-framed sheds, the most suitable insulation materials are soft roll or batt insulation made of either fiberglass or mineral wool. These materials work well because they are flexible and easy to handle, making them ideal for fitting into the small spaces between the framing studs.
For wood-framed sheds, it’s important to choose insulation that matches the size of the framing used in construction. Most wood-framed sheds are built with two-by-fours, so the appropriate thickness of mineral wool or fiberglass insulation should be 3-1/2 inches. This thickness corresponds to an R-value of R-13 or R-15, which is the measure of insulation’s resistance to heat flow. The higher the R-value, the more effective the insulation will be at keeping the shed warm in the winter and cool in the summer.
Fiberglass Insulation
Pros
- Less expensive than mineral wool
- Staples easily to the studs
- Good R-value
- Easy to find
Cons
- Must be fully suited to work with fiberglass
- Can absorb moisture
While both fiberglass and mineral wool insulation are soft and can fit into wall cavities, there are some key differences between the two. Fiberglass insulation is less expensive than mineral wool, readily available, and often comes with an attached paper vapor barrier. However, fiberglass insulation can be itchy to work with and may also slump over time, which can compromise its effectiveness.
Mineral wool, on the other hand, is made by spinning molten basalt or slag into fibers, and it is approximately 25% more expensive than fiberglass insulation. It can also be harder to find in some locations. Unlike fiberglass insulation, mineral wool is unfaced, meaning that it requires a separate vapor retarder to be installed. However, mineral wool is easy to work with because it is not itchy, and it offers better soundproofing qualities than fiberglass insulation.
Overall, the choice between fiberglass and mineral wool insulation may come down to the specific needs of a project. Fiberglass insulation is a more affordable and readily available option, but it may not be the best choice for those who are sensitive to itchiness or looking for a long-lasting solution. Mineral wool insulation, while more expensive and requiring a separate vapor barrier, offers superior soundproofing qualities and ease of use, making it a good choice for some projects.
Insulation Made of Mineral Wool
Pros
- Not itchy
- Non-combustible
- Absorbs and limits sound well
- Hydrophobic
Cons
- More expensive than fiberglass
- Can be difficult to find
- Heavier than fiberglass
- Needs a separate vapor barrier
Vapor Retarder
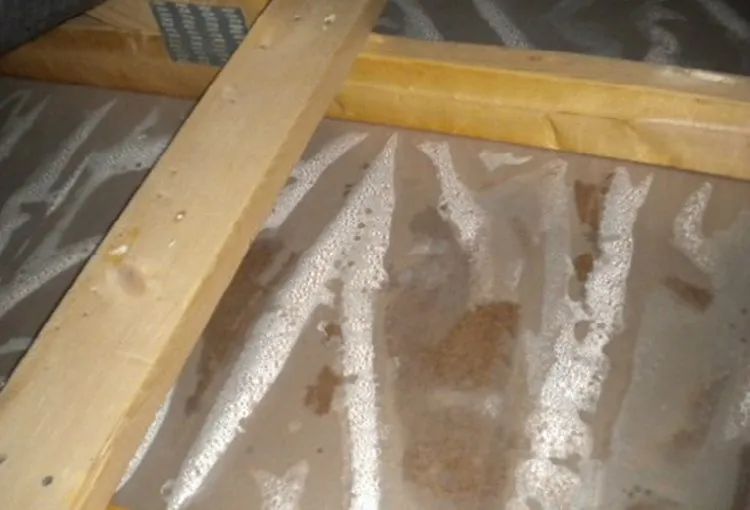
The placement of a vapor retarder is crucial for effective insulation in different climates. In cool or cold climates where the shed will be heated more than cooled, a vapor retarder is required on the warm side of the shed, which is the interior side. The barrier will help to prevent moisture from entering the wall cavity and condensing on the cool side of the insulation. In contrast, in warm climates where the shed will mostly be artificially cooled, the barrier is placed on the exterior side of the insulation, between the insulation and the inner side of the shed sheathing, to prevent moisture from entering the wall cavity and condensing on the warm side of the insulation. In mild climates, a vapor retarder may not be necessary.
Faced fiberglass insulation has an attached paper facing that acts as a vapor retarder, making it an easy option for insulation with a built-in barrier. However, with mineral wool insulation, separate 6-mil plastic sheeting is often used as a vapor retarder. This plastic sheeting is installed over the insulation before the interior finish is added. It is important to note that when installing a vapor retarder, it should be properly sealed and any gaps or holes should be covered with tape or caulk to ensure a tight seal. This will prevent any moisture from entering the wall cavity and compromising the effectiveness of the insulation.
Tip
To enhance insulation performance, it is recommended to upgrade from 6-mil polyethylene sheeting to a 2-mil polyamide (nylon) vapor retarder designed specifically for walls. This upgraded vapor retarder provides better moisture resistance and is more durable than polyethylene sheeting. With a width of slightly over 8 feet, this vapor retarder is the perfect size for walls, allowing for easy installation and minimal waste.
Wall Covering
Although it is not technically required to install a wall covering over the insulation when insulating a shed, it is highly recommended to ensure optimal performance.
Mineral wool insulation is designed to fit tightly between studs and does not require stapling. However, it is still recommended to install a hard outer covering, such as drywall or plywood, to hold the insulation in place and protect it from potential damage caused by insects or vermin.
Similarly, fiberglass batt insulation is held in place by its paper edges, but it is even more essential to install a hard covering over fiberglass insulation. This is because fiberglass has a tendency to slump over time, and without a hard covering, the insulation may shift and settle, leading to gaps that can compromise the effectiveness of the insulation. Additionally, a hard covering can protect the insulation from potential damage caused by pests or other external factors.
Two-by-Four Studs (Optional)
In some cases, sheds may not have wall studs spaced every 16 or 24 inches, which is the customary width for wall systems in houses. Instead, many ready-to-assemble sheds rely on the exterior sheathing for much of their structural support. This can present an issue when it comes to insulating the shed with fiberglass or mineral wool, as these types of insulation are designed for 16- or 24-inch wall cavities.
To address this issue, extra non-structural two-by-four studs can be added to hold the insulation in place. These additional studs not only provide support for the insulation, but also offer more options for attaching fasteners when installing drywall or other types of wall coverings. By adding these extra studs, the insulation can be properly installed and the wall covering can be attached securely, resulting in a well-insulated and structurally sound shed.
When to Insulate a Shed
Insulating a shed is possible at any time of the year, and it’s recommended to install the insulation before the onset of summer or winter to make use of the shed before extreme weather conditions set in. It’s advisable to choose mild weather conditions, ideally between 40 and 90°F, to ensure the most comfortable working conditions and avoid rushing the project. It’s crucial to note that insulation should never be installed in walls that have condensation. This is because condensation occurs when warm, humid air comes into contact with a cool surface such as the inside of a wall.
Safety Considerations
To ensure safety when handling fiberglass or mineral wool insulation, it’s essential to wear appropriate protective gear. When working with fiberglass, safety glasses with side shields, gloves, long sleeves, and pants should be worn to minimize skin exposure. In addition, it’s recommended to wear a NIOSH-certified disposable or reusable particulate respirator that is rated N95 or higher to prevent inhalation of fibers.
Materials and Equipment Required
Equipment / Tools
- 1 tape measure
- 1 circular saw
- 1 bread knife or insulation knife
- 1 straight edge or metal square
- 1 utility knife
- 1 staple gun
- 1 ladder
- 1 hammer
- 1 gloves, goggles, and a respirator
Materials
- 200 square feet insulation, fiberglass or mineral wool
- 2 panels rigid foam insulation, 2-inch
- 1 latex-based foam board adhesive
- 8 panels wall covering: drywall or plywood
- 1 vapor barrier
- 1 seam tape
- 1 expanding foam insulation
- 1 caulk
- 1 door sweep
Instructions
1. Add Studs If Needed
If the walls lack studs placed every 16 inches on-center, you should add the required number of studs. Measure the distance from wall to wall and divide it by 16. The quotient will give you the number of wall cavities required. Deduct one from the result to get the total number of studs that the wall needs.
Individually cut each stud since wall height may differ along the wall’s length. Secure the studs in place by toe nailing.
Tip
In a wall that is 64 inches long with a stud at each end but no studs in between, you would need to divide 64 by 16, which results in four wall cavities required. To determine the number of additional studs needed, subtract one from four to get three.
2. Taking Measurements for Shed Insulation
To determine the required amount of insulation, take measurements of the walls and ceiling of the shed. If the wall studs are spaced at 16-inch intervals, count the number of wall cavities that are the full width of the shed (measuring 15-1/4 inches from one stud’s side to the adjacent stud’s side). Multiply the number of cavities by eight, assuming that the walls are between 7-1/2 and 8 feet tall. The resulting figure represents the length of insulation required in feet.
Tip
For instance: if there are four wall cavities, then multiplying this number by eight gives us a total of 32. Thus, 32 linear feet of batt or roll insulation will be necessary to insulate the wall.
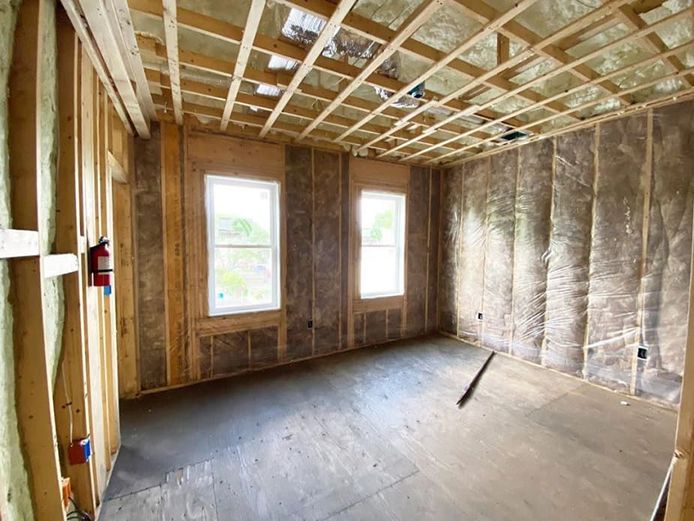
3. Get the Shed Ready
To ready the shed for insulation, clear out any debris or existing insulation from the walls, ceiling, and floor. Ensure that the surfaces are both dry and clean. Patch any cracks or gaps that you come across.
4. Trim Insulation to the Appropriate Size
Begin by sweeping the floor, then unroll or unfold the insulation on it. Measure the height of the first wall cavity you want to fill, and transfer that measurement to the insulation. Use a straightedge to mark the measurement on the insulation, and then cut it with a knife.
Tip
Use a large serrated bread knife that you no longer intend to use for food preparation to cut the insulation. Alternatively, you could purchase an insulation knife for $15 to $25. Avoid using scissors or a utility knife as insulation can be challenging to cut using these tools.
5. Trim Insulation to Fit Around Obstacles
If using fiberglass insulation, flip it upside down; if using mineral wool insulation, leave it as is. Use a tape measure to determine the position of any obstructions in the wall cavity, such as wires, pipes, outlet boxes, or light switch boxes. Transfer the measurements to the insulation, and make a complete cut in the insulation to allow for items that penetrate the insulation fully, like boxes. When it comes to wires cut roughly halfway through the insulation.
6. Add Insulation to the Shed Walls
Insert the insulation into the wall cavities, pressing it in tightly. For fiberglass insulation, staple the paper facing to the wall studs. For mineral wool insulation, use a friction-fit approach.
7. Add Insulation to the Shed Ceiling
In case the ceiling rafters are spaced 15-1/4 inches apart, insulate the ceiling similarly to the walls. Make cuts in the insulation around skylights and ceiling lights.
8. Apply Caulk and Spray Foam Insulation
Use caulk to seal smaller gaps or cracks, while expanding spray can insulation is ideal for filling narrow areas above door or window headers or to fill gap and cracks.
9. Install the Vapor Barrier
When installing mineral wool insulation, attach the vapor barrier to the walls using staples. Run the barrier in a continuous strip for better sealing, and staple it to the studs. Finally, cover the staples and seams with seam tape.
10. Add Insulation to the Shed Door
To insulate a basic shed door, measure its dimensions and cut a 2-inch rigid foam insulation piece to that size, leaving a 1-inch margin around the perimeter. Use foam board adhesive to attach the piece to the inside of the door, and then screw a door sweep to the bottom of the door to prevent drafts.
Tip
As insulating shed doors can be challenging, a better alternative is to replace them with a pre-hung door unit, which is more effective in insulation and weatherproofing. Not only are pre-hung door units more aesthetically pleasing, but they are also ideal if you plan to convert your shed into a complete accessory dwelling unit (ADU), such as an office or a home gym.
11. Install the Wall Covering
Install the wall covering onto the walls and ceiling. You may choose to use drywall, wood panels, or even plywood for this purpose.